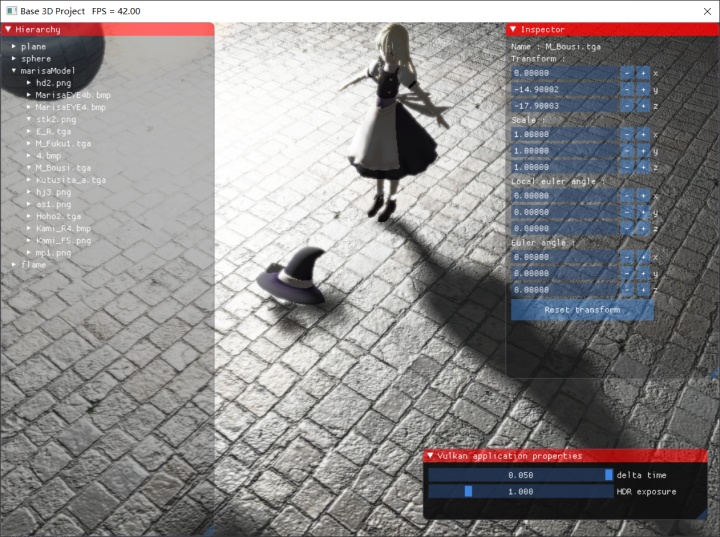
对于拥有大量光照的场景,经典的前向渲染(Forward Shading)由于其逐片元的计算通常会产生大量的开销,因此出现了许多用于解决这一问题的算法,常见的有延迟渲染(Deferred Shading)和Forward+渲染,在这一节中我们主要来研究使用Vulkan的Subpass技术来简化延迟渲染的实现(这也是Subpass的主要用途之一)。

原理

延迟渲染的主要优化方案是不使用传统光栅化的将每个图形片元的位置计算出来,再逐片元依次计算光照,取而代之的,只保留屏幕空间中所有需要显示的像素及其片元信息(通常称作G-Buffer),再依次为每个像素计算光照。延迟渲染的最大优点是在拥有极大量光源的场景中能大大减少计算量,最大缺点便是无法绘制任何透明物体(因为颜色混合操作的不可行)。

藉由这样的思路,我们得知需要实现延迟渲染至少要经过两个Pass,而在Vulkan中,这两个Pass可以放在一个RenderPass中由两个Subpass实现,第一个Subpass负责将需要的片元数据输出(获取G-Buffer),第二个Pass则负责进行逐片元的光照计算。

输出着色器

在第一个Subpass中,我们使用的顶点着色器和通常的顶点着色器功能是完全一致的,即进行逐顶点的数据计算。我将所有着色器共用的数据放在Common.hlsl中,之后只需要所有其他HLSL包含这个文件即可。

1
2
3
4
5
6
7
8
9
10
11
12
13
14
15
16
17
18
19
20
21
22
23
24
25
26
//Common.hlsl
#define NUM_DIRECTIONAL_LIGHT 1
#define NUM_POINT_LIGHT 10
#define NUM_SPOT_LIGHT 1

struct Light {
float3 strength;
float fallOffStart; //point/spot light only
float3 direction; //directional/spot light only
float fallOffEnd; //point/spot light only
float3 position; //point/spot light only
float spotPower; //spot light only
};

[vk::binding(0, 2)]
cbuffer PassConstants {
float4x4 viewMatrix;
float4x4 projMatrix;
float4x4 viewMatrix_inv;
float4x4 shadowTransform;

float4 eyePos;
float4 ambientLight;

Light lights[NUM_DIRECTIONAL_LIGHT + NUM_POINT_LIGHT + NUM_SPOT_LIGHT];
};

VertexShader的代码如下所示:

1
2
3
4
5
6
7
8
9
10
11
12
13
14
15
16
17
18
19
20
21
22
23
24
25
26
27
28
29
30
31
32
33
34
35
36
37
38
39
40
//VertexShader.hlsl
#include "Common.hlsl"

struct VertexIn {
float3 posL;
float2 texCoord;
float3 normal;
float3 tangent;
};

struct VertexOut {
float4 position : SV_POSITION;
float3 posW;
float2 texCoord;
float3 normal;
float3 tangent;
float4 shadowPos;
};

[vk::binding(0, 0)]
cbuffer ObjectConstants {
float4x4 worldMatrix;
float4x4 worldMatrix_trans_inv;
};

VertexOut main(VertexIn input) {
VertexOut output;

float4x4 viewProjMatrix = mul(projMatrix, viewMatrix);

output.posW = float3(mul(worldMatrix, float4(input.posL, 1.0f)));
output.position = mul(viewProjMatrix, float4(output.posW, 1.0f));
output.normal = float3(mul(worldMatrix_trans_inv, float4(input.normal, 0.0f)));
output.tangent = float3(mul(worldMatrix, float4(input.tangent, 0.0f)));

output.shadowPos = mul(shadowTransform, float4(output.posW, 1.0f));
output.texCoord = input.texCoord;

return output;
}

而这里我们使用的像素着色器却不需要进行任何的光照计算,光照计算将在第二个Subpass中完成,在这一个像素着色器中只需要完成一些必须的工作就行了,例如计算法向量(采样法线贴图),获取材质信息:

1
2
3
4
5
6
7
8
9
10
11
12
13
14
15
16
17
18
19
20
21
22
23
24
25
26
27
28
29
30
31
32
33
34
35
36
37
38
39
40
41
42
43
44
45
46
47
48
49
50
51
52
53
54
55
56
57
58
59
60
61
62
63
//DeferredShadingOutput.hlsl
struct PixelIn {
float4 position : SV_POSITION;
float3 posW;
float2 texCoord;
float3 normal;
float3 tangent;
float4 shadowPos;
};

[vk::binding(0, 1)]
cbuffer MaterialConstants {
float4x4 matTransform;
float4 diffuseAlbedo;
float3 fresnelR0;
float roughness;
}

[vk::binding(1, 1)]
SamplerState samplerState;

[vk::binding(2, 1)]
Texture2D tex;

[vk::binding(3, 1)]
Texture2D normalMap;

float3 NormalSampleToWorldSpace(float3 normalMapSample, float3 unitNormalW, float3 tangentW) {
//映射法向量从[0,1]至[-1,1]
float3 normalT = 2.0f * normalMapSample - 1.0f;

//构建TBN基底
float3 N = unitNormalW;
float3 T = normalize(tangentW - dot(tangentW, N) * N);
float3 B = cross(N, T);

float3x3 TBN = float3x3(T, B, N);

//将法向量从切线空间变换至世界空间
float3 normal = mul(normalT, TBN);
normal.z = -normal.z;

return normal;
}

void main(PixelIn input,
[vk::location(0)] out float4 diffuse,
[vk::location(1)] out float4 normal,
[vk::location(2)] out float4 materialProperties,
[vk::location(3)] out float4 position,
[vk::location(4)] out float4 shadowPos) {

diffuse = diffuseAlbedo * tex.Sample(samplerState, mul((float2x2)matTransform, input.texCoord));

normal.xyz = normalize(input.normal);

float4 normalMapSample = normalMap.Sample(samplerState, mul((float2x2)matTransform, input.texCoord));
normal.xyz = NormalSampleToWorldSpace(normalMapSample.rgb, input.normal, input.tangent);

materialProperties = float4(fresnelR0, roughness);
position = float4(input.posW, 1.0f);
shadowPos = input.shadowPos;
}

在这个像素着色器中,我总共设定了5个输出量(漫反射颜色,法向量,材质属性,位置,阴影坐标),而这5个输出量就构成了我们用于延迟渲染的G-Buffer,它将作为输入值传递至下一个Subpass中进行处理。

处理着色器

第二个Subpass的重点在像素着色器上,顶点着色器只是简单地绘制一个屏幕空间矩形,并不传递任何数据:

1
2
3
4
5
6
7
8
9
10
11
12
13
14
15
16
17
18
19
20
21
22
23
24
//DeferredShadingQuad.hlsl
struct VertexOut {
float4 position : SV_POSITION;
float2 farPlane;
};

VertexOut main(uint vertexId : SV_VertexID) {
VertexOut output;

if (vertexId == 0) {
output.position = float4(-1.0f, -1.0f, 0.0f, 1.0f);
}
else if (vertexId == 1) {
output.position = float4(1.0f, -1.0f, 0.0f, 1.0f);
}
else if (vertexId == 2) {
output.position = float4(-1.0f, 1.0f, 0.0f, 1.0f);
}
else if (vertexId == 3) {
output.position = float4(1.0f, 1.0f, 0.0f, 1.0f);
}

return output;
}

在像素着色器中,我们通过InputAttachment接收G-Buffer数据(已在第五节中讲解过),并完成最后的数据处理和光照计算(光照算法来自DX12龙书,LightingUtil.hlsl的代码会放在文章末尾附录中,这并不是本文的重点):

1
2
3
4
5
6
7
8
9
10
11
12
13
14
15
16
17
18
19
20
21
22
23
24
25
26
27
28
29
30
31
32
33
34
35
36
37
38
39
40
41
42
43
44
45
46
47
48
49
50
51
52
53
54
55
56
57
58
59
60
61
62
63
64
65
66
67
68
69
70
71
72
73
74
75
76
77
//DeferredShadingProcessing.hlsl
#include "LightingUtil.hlsl"

[vk::input_attachment_index(0)] [vk::binding(0, 1)] SubpassInput inDiffuseAlbedo;
[vk::input_attachment_index(1)] [vk::binding(1, 1)] SubpassInput inNormal;
[vk::input_attachment_index(2)] [vk::binding(2, 1)] SubpassInput inMaterialProperties;
[vk::input_attachment_index(3)] [vk::binding(3, 1)] SubpassInput inPosition;
[vk::input_attachment_index(4)] [vk::binding(4, 1)] SubpassInput inShadowPos;
[vk::input_attachment_index(5)] [vk::binding(5, 1)] SubpassInput inDepth;

struct PixelIn {
float4 position : SV_POSITION;
float2 farPlane;
};

[vk::binding(1, 2)] TextureCube cubeMap;
[vk::binding(1, 2)] SamplerState cubeMapSampler;

float zNear = 0.1f;
float zFar = 1000.0f;

float3 ComputeWorldPos(float2 farPlane, float depth) {
float4 pos = float4(float3(farPlane.x, farPlane.y, -zFar) * depth, 1.0f);
float4 ret = viewMatrix_inv * pos;
return ret.xyz / ret.w;
}

float4 main(PixelIn input) : SV_TARGET{
//从InputAttachment中读出所有数据
float4 diffuse = inDiffuseAlbedo.SubpassLoad();
float3 posW = inPosition.SubpassLoad().rgb;
float3 normal = inNormal.SubpassLoad().rgb;
float4 shadowPos = inShadowPos.SubpassLoad();
float3 fresnelR0 = inMaterialProperties.SubpassLoad().rgb;
float roughness = inMaterialProperties.SubpassLoad().a;

//计算出光照的基本参数
float3 toEye = normalize(eyePos.xyz - posW);

//整合材质
const float shininess = 1.0f - roughness;
Material mat = { float4(1.0f, 1.0f, 1.0f, 1.0f), fresnelR0, shininess };

//计算出阴影因子
float shadowFactor = CalcShadowFactor(shadowPos);

//计算出光照的值
float3 lightingResult = float3(0.0f, 0.0f, 0.0f);

//计算三光照
[unroll]
for (int i = 0; i < NUM_DIRECTIONAL_LIGHT; i++)
lightingResult += shadowFactor * ComputeDirectionalLight(lights[i], mat, normal, toEye);

[unroll]
for (int i = 0; i < NUM_POINT_LIGHT; i++) {
int lightIndex = NUM_DIRECTIONAL_LIGHT + i;
lightingResult += shadowFactor * ComputePointLight(lights[lightIndex], mat, posW, normal, toEye);
}

[unroll]
for (int i = 0; i < NUM_SPOT_LIGHT; i++) {
int lightIndex = NUM_DIRECTIONAL_LIGHT + NUM_POINT_LIGHT + i;
lightingResult += shadowFactor * ComputeSpotLight(lights[lightIndex], mat, posW, normal, toEye);
}

float4 litColor = diffuse * (ambientLight + float4(lightingResult, 1.0f));

//计算来自环境贴图的镜面反射
float3 r = reflect(-toEye, normal);
float4 reflectionColor = cubeMap.Sample(cubeMapSampler, r);
float3 fresnelFactor = SchlickFresnel(fresnelR0, normal, r);
litColor.rgb += shininess * fresnelFactor * reflectionColor.rgb;

litColor.a = 1.0f;
return litColor;
}

构建RenderPass

关于构建RenderPass的相关细节已在第五节中讲解过,这里不再赘述。我们需要创建一个RenderPass和其下的两个Subpass,在第一个Subpass中,我们需要一个深度附件用于剔除被遮挡的物体,同时需要5个颜色附件用于储存输出的G-Buffer,其对应代码如下所示:

1
2
3
4
5
6
7
8
9
10
11
12
13
14
15
16
17
18
19
20
21
22
23
24
25
26
27
28
29
30
31
32
33
34
35
36
37
38
39
40
41
42
43
44
45
46
47
48
49
50
51
52
53
54
55
56
57
58
59
60
61
62
63
64
65
66
67
68
69
70
71
72
73
74
75
76
77
78
79
80
81
82
83
std::vector<vk::AttachmentDescription> attachments(7);

//depth stencil
attachments[1].setFormat(vk::Format::eD16Unorm);
attachments[1].setInitialLayout(vk::ImageLayout::eUndefined);
attachments[1].setFinalLayout(vk::ImageLayout::eDepthStencilAttachmentOptimal);
attachments[1].setLoadOp(vk::AttachmentLoadOp::eClear);
attachments[1].setStoreOp(vk::AttachmentStoreOp::eStore);
attachments[1].setStencilLoadOp(vk::AttachmentLoadOp::eClear);
attachments[1].setStencilStoreOp(vk::AttachmentStoreOp::eStore);
attachments[1].setSamples(vk::SampleCountFlagBits::e1);

//diffuse albedo
attachments[2].setFormat(vk::Format::eR8G8B8A8Unorm);
attachments[2].setInitialLayout(vk::ImageLayout::eUndefined);
attachments[2].setFinalLayout(vk::ImageLayout::eColorAttachmentOptimal);
attachments[2].setLoadOp(vk::AttachmentLoadOp::eClear);
attachments[2].setStoreOp(vk::AttachmentStoreOp::eDontCare);
attachments[2].setStencilLoadOp(vk::AttachmentLoadOp::eDontCare);
attachments[2].setStencilStoreOp(vk::AttachmentStoreOp::eDontCare);
attachments[2].setSamples(vk::SampleCountFlagBits::e1);

//normal
attachments[3].setFormat(vk::Format::eR32G32B32A32Sfloat);
attachments[3].setInitialLayout(vk::ImageLayout::eUndefined);
attachments[3].setFinalLayout(vk::ImageLayout::eColorAttachmentOptimal);
attachments[3].setLoadOp(vk::AttachmentLoadOp::eClear);
attachments[3].setStoreOp(vk::AttachmentStoreOp::eDontCare);
attachments[3].setStencilLoadOp(vk::AttachmentLoadOp::eDontCare);
attachments[3].setStencilStoreOp(vk::AttachmentStoreOp::eDontCare);
attachments[3].setSamples(vk::SampleCountFlagBits::e1);

//material properties
attachments[4].setFormat(vk::Format::eR32G32B32A32Sfloat);
attachments[4].setInitialLayout(vk::ImageLayout::eUndefined);
attachments[4].setFinalLayout(vk::ImageLayout::eColorAttachmentOptimal);
attachments[4].setLoadOp(vk::AttachmentLoadOp::eClear);
attachments[4].setStoreOp(vk::AttachmentStoreOp::eDontCare);
attachments[4].setStencilLoadOp(vk::AttachmentLoadOp::eDontCare);
attachments[4].setStencilStoreOp(vk::AttachmentStoreOp::eDontCare);
attachments[4].setSamples(vk::SampleCountFlagBits::e1);

//position
attachments[5].setFormat(vk::Format::eR32G32B32A32Sfloat);
attachments[5].setInitialLayout(vk::ImageLayout::eUndefined);
attachments[5].setFinalLayout(vk::ImageLayout::eColorAttachmentOptimal);
attachments[5].setLoadOp(vk::AttachmentLoadOp::eClear);
attachments[5].setStoreOp(vk::AttachmentStoreOp::eDontCare);
attachments[5].setStencilLoadOp(vk::AttachmentLoadOp::eDontCare);
attachments[5].setStencilStoreOp(vk::AttachmentStoreOp::eDontC11are);
attachments[5].setSamples(vk::SampleCountFlagBits::e1);

//shadow position
attachments[6].setFormat(vk::Format::eR32G32B32A32Sfloat);
attachments[6].setInitialLayout(vk::ImageLayout::eUndefined);
attachments[6].setFinalLayout(vk::ImageLayout::eColorAttachmentOptimal);
attachments[6].setLoadOp(vk::AttachmentLoadOp::eClear);
attachments[6].setStoreOp(vk::AttachmentStoreOp::eDontCare);
attachments[6].setStencilLoadOp(vk::AttachmentLoadOp::eDontCare);
attachments[6].setStencilStoreOp(vk::AttachmentStoreOp::eDontCare);
attachments[6].setSamples(vk::SampleCountFlagBits::e1);

vk::AttachmentReference colorReference[5];
colorReference[0].setAttachment(2);
colorReference[0].setLayout(vk::ImageLayout::eColorAttachmentOptimal);
colorReference[1].setAttachment(3);
colorReference[1].setLayout(vk::ImageLayout::eColorAttachmentOptimal);
colorReference[2].setAttachment(4);
colorReference[2].setLayout(vk::ImageLayout::eColorAttachmentOptimal);
colorReference[3].setAttachment(5);
colorReference[3].setLayout(vk::ImageLayout::eColorAttachmentOptimal);
colorReference[4].setAttachment(6);
colorReference[4].setLayout(vk::ImageLayout::eColorAttachmentOptimal);

vk::AttachmentReference depthReference;
depthReference.setAttachment(1);
depthReference.setLayout(vk::ImageLayout::eDepthStencilAttachmentOptimal);

std::vector<vk::SubpassDescription> subpassDescriptions(2);
subpassDescriptions[0].setPipelineBindPoint(vk::PipelineBindPoint::eGraphics);
subpassDescriptions[0].setColorAttachmentCount(5);
subpassDescriptions[0].setPColorAttachments(colorReference);
subpassDescriptions[0].setPDepthStencilAttachment(&depthReference);

在第二个Subpass中,我们将第一个Subpass输出的G-Buffer(包括深度缓冲)作为InputAttachment输入,同时只需要一个RenderTarget来存储最终输出的结果:

1
2
3
4
5
6
7
8
9
10
11
12
13
14
15
16
17
18
19
20
21
22
23
24
25
26
27
28
29
30
31
32
33
//render target
attachments[0].setFormat(vk::Format::eR16G16B16A16Sfloat);
attachments[0].setInitialLayout(vk::ImageLayout::eUndefined);
attachments[0].setFinalLayout(vk::ImageLayout::eColorAttachmentOptimal);
attachments[0].setLoadOp(vk::AttachmentLoadOp::eClear);
attachments[0].setStoreOp(vk::AttachmentStoreOp::eStore);
attachments[0].setStencilLoadOp(vk::AttachmentLoadOp::eDontCare);
attachments[0].setStencilStoreOp(vk::AttachmentStoreOp::eDontCare);
attachments[0].setSamples(vk::SampleCountFlagBits::e1);

vk::AttachmentReference inputReference[6];
inputReference[0].setAttachment(2);
inputReference[0].setLayout(vk::ImageLayout::eShaderReadOnlyOptimal);
inputReference[1].setAttachment(3);
inputReference[1].setLayout(vk::ImageLayout::eShaderReadOnlyOptimal);
inputReference[2].setAttachment(4);
inputReference[2].setLayout(vk::ImageLayout::eShaderReadOnlyOptimal);
inputReference[3].setAttachment(5);
inputReference[3].setLayout(vk::ImageLayout::eShaderReadOnlyOptimal);
inputReference[4].setAttachment(6);
inputReference[4].setLayout(vk::ImageLayout::eShaderReadOnlyOptimal);
inputReference[5].setAttachment(1);
inputReference[5].setLayout(vk::ImageLayout::eShaderReadOnlyOptimal);

vk::AttachmentReference renderTargetReference;
renderTargetReference.setAttachment(0);
renderTargetReference.setLayout(vk::ImageLayout::eColorAttachmentOptimal);

subpassDescriptions[1].setPipelineBindPoint(vk::PipelineBindPoint::eGraphics);
subpassDescriptions[1].setColorAttachmentCount(1);
subpassDescriptions[1].setPColorAttachments(&renderTargetReference);
subpassDescriptions[1].setInputAttachmentCount(6);
subpassDescriptions[1].setPInputAttachments(inputReference);

需要注意,着色器不可以直接引用InputAttachment,而必须要先将InputAttachment在PipelineLayout中和描述符绑定才可使用,这部分在正篇第五节中已经讲过,有需要可以去翻看。

在构建完两个Subpass后,进行SubpassDependency的构建以及完成RenderPass的创建:

1
2
3
4
5
6
7
8
9
10
11
12
13
14
15
16
17
std::vector<vk::SubpassDependency> subpassDependencies(1);
subpassDependencies[0].setSrcSubpass(0);
subpassDependencies[0].setDstSubpass(1);
subpassDependencies[0].setSrcAccessMask(vk::AccessFlagBits::eColorAttachmentWrite);
subpassDependencies[0].setDstAccessMask(vk::AccessFlagBits::eInputAttachmentRead);
subpassDependencies[0].setSrcStageMask(vk::PipelineStageFlagBits::eColorAttachmentOutput);
subpassDependencies[0].setDstStageMask(vk::PipelineStageFlagBits::eFragmentShader);
subpassDependencies[0].setDependencyFlags(vk::DependencyFlagBits::eByRegion);

auto renderPassInfo = vk::RenderPassCreateInfo()
.setAttachmentCount(attachments.size())
.setPAttachments(attachments.data())
.setDependencyCount(subpassDependencies.size())
.setPDependencies(subpassDependencies.data())
.setSubpassCount(subpassDescriptions.size())
.setPSubpasses(subpassDescriptions.data());
vkInfo->device.createRenderPass(&renderPassInfo, 0, &deferredShading.renderPass);

最后再小小地花一点时间完成所有需要用到的附件对应的Framebuffer的创建:

1
2
3
4
5
6
7
8
9
10
11
12
13
14
15
16
17
vk::ImageView imageViewAttachments[7];
imageViewAttachments[0] = renderTarget.imageView;
imageViewAttachments[1] = depthTarget.imageView;
imageViewAttachments[2] = gbuffer.diffuseAttach.imageView;
imageViewAttachments[3] = gbuffer.normalAttach.imageView;
imageViewAttachments[4] = gbuffer.materialAttach.imageView;
imageViewAttachments[5] = gbuffer.positionAttach.imageView;
imageViewAttachments[6] = gbuffer.shadowPosAttach.imageView;

auto framebufferCreateInfo = vk::FramebufferCreateInfo()
.setAttachmentCount(7)
.setPAttachments(imageViewAttachments)
.setLayers(1)
.setWidth(vkInfo->width)
.setHeight(vkInfo->height)
.setRenderPass(deferredShading.renderPass);
vkInfo->device.createFramebuffer(&framebufferCreateInfo, 0, &deferredShading.framebuffer);

构建Pipeline

我们将使用两个Subpass完成绘制,这也就意味着我们需要准备两个拥有不同着色器的渲染管线,它们的创建如下所示(不必要的步骤已略去):

1
2
3
4
5
6
7
8
9
10
11
12
13
14
15
16
17
18
19
20
21
22
23
24
25
26
27
28
29
30
31
32
33
34
35
36
37
38
39
40
41
42
43
44
45
46
47
48
49
50
51
52
53
54
55
56
57
58
59
60
61
62
63
64
65
66
67
68
69
70
71
72
73
74
75
76
77
78
79
80
81
82
auto vertexShader = CreateShaderModule("Shaders\\vertex.spv", vkInfo->device);
auto outputShader = CreateShaderModule("Shaders\\deferredShadingOutput.spv", vkInfo->device);
auto quadShader = CreateShaderModule("Shaders\\deferredShadingScreenQuad.spv", vkInfo->device);
auto processingShader = CreateShaderModule("Shaders\\deferredShadingProcessing.spv", vkInfo->device);

std::vector<vk::PipelineShaderStageCreateInfo> pipelineShaderInfo(2);

pipelineShaderInfo[0] = vk::PipelineShaderStageCreateInfo()
.setPName("main")
.setModule(vertexShader)
.setStage(vk::ShaderStageFlagBits::eVertex);

pipelineShaderInfo[1] = vk::PipelineShaderStageCreateInfo()
.setPName("main")
.setModule(outputShader)
.setStage(vk::ShaderStageFlagBits::eFragment);

auto iaInfo = vk::PipelineInputAssemblyStateCreateInfo()
.setTopology(vk::PrimitiveTopology::eTriangleList)
.setPrimitiveRestartEnable(VK_FALSE);

auto viInfo = vk::PipelineVertexInputStateCreateInfo()
.setVertexBindingDescriptionCount(1)
.setPVertexBindingDescriptions(&vkInfo->vertex.binding)
.setVertexAttributeDescriptionCount(vkInfo->vertex.attrib.size())
.setPVertexAttributeDescriptions(vkInfo->vertex.attrib.data());

auto cbInfo = vk::PipelineColorBlendStateCreateInfo()
.setLogicOpEnable(VK_FALSE)
.setAttachmentCount(attState.size())
.setPAttachments(attState.data())
.setLogicOp(vk::LogicOp::eNoOp);

/*省略其它步骤*/

auto pipelineInfo = vk::GraphicsPipelineCreateInfo()
.setLayout(vkInfo->pipelineLayout["scene"])
.setPColorBlendState(&cbInfo)
.setPDepthStencilState(&dsInfo)
.setPDynamicState(&dynamicInfo)
.setPMultisampleState(&msInfo)
.setPRasterizationState(&rsInfo)
.setStageCount(pipelineShaderInfo.size())
.setPStages(pipelineShaderInfo.data())
.setPViewportState(&vpInfo)
.setRenderPass(deferredShading.renderPass)
.setPInputAssemblyState(&iaInfo)
.setPVertexInputState(&viInfo);

vkInfo->device.createGraphicsPipelines(vk::PipelineCache(), 1, &pipelineInfo, 0, &deferredShading.outputPipeline);

pipelineShaderInfo[0] = vk::PipelineShaderStageCreateInfo()
.setPName("main")
.setModule(quadShader)
.setStage(vk::ShaderStageFlagBits::eVertex);

pipelineShaderInfo[1] = vk::PipelineShaderStageCreateInfo()
.setPName("main")
.setModule(processingShader)
.setStage(vk::ShaderStageFlagBits::eFragment);

iaInfo = vk::PipelineInputAssemblyStateCreateInfo()
.setTopology(vk::PrimitiveTopology::eTriangleStrip)
.setPrimitiveRestartEnable(VK_FALSE);

viInfo = vk::PipelineVertexInputStateCreateInfo();

cbInfo = vk::PipelineColorBlendStateCreateInfo()
.setLogicOpEnable(VK_FALSE)
.setAttachmentCount(1)
.setPAttachments(attState.data())
.setLogicOp(vk::LogicOp::eNoOp);

pipelineInfo.setSubpass(1);
pipelineInfo.setLayout(deferredShading.pipelineLayout);

vkInfo->device.createGraphicsPipelines(vk::PipelineCache(), 1, &pipelineInfo, 0, &deferredShading.processingPipeline);

vkInfo->device.destroy(vertexShader);
vkInfo->device.destroy(outputShader);
vkInfo->device.destroy(quadShader);
vkInfo->device.destroy(processingShader);

绘制

在开始每一帧的绘制之前,还是照例需要启动RenderPass并完成清屏,由于我们使用的Framebuffer比较多,所以清屏需要指定的内容也比较多(注意和RenderPass绑定的附件之间的对应关系):

1
2
3
4
5
6
7
8
9
10
11
12
13
14
15
vk::ClearValue clearValue[7];
clearValue[0].setColor(vk::ClearColorValue(std::array<float, 4>({ 0.0f, 0.0f, 0.0f, 0.0f })));
clearValue[1].setDepthStencil(vk::ClearDepthStencilValue(1.0f, 0.0f));
clearValue[2].setColor(vk::ClearColorValue(std::array<float, 4>({ 0.0f, 0.0f, 0.0f, 0.0f })));
clearValue[3].setColor(vk::ClearColorValue(std::array<float, 4>({ 0.0f, 0.0f, 0.0f, 0.0f })));
clearValue[4].setColor(vk::ClearColorValue(std::array<float, 4>({ 0.0f, 0.0f, 0.0f, 0.0f })));
clearValue[5].setColor(vk::ClearColorValue(std::array<float, 4>({ 0.0f, 0.0f, 0.0f, 0.0f })));
clearValue[6].setColor(vk::ClearColorValue(std::array<float, 4>({ 0.0f, 0.0f, 0.0f, 0.0f })));
auto renderPassBeginInfo = vk::RenderPassBeginInfo()
.setClearValueCount(7)
.setPClearValues(clearValue)
.setFramebuffer(deferredShading.framebuffer)
.setRenderPass(deferredShading.renderPass)
.setRenderArea(vk::Rect2D(vk::Offset2D(0.0f, 0.0f), vk::Extent2D(vkInfo->width, vkInfo->height)));
cmd.beginRenderPass(&renderPassBeginInfo, vk::SubpassContents::eInline);

在绘制时,和通常一样首先绑定顶点缓冲(和索引缓冲),管线和描述符集,然后进行第一个Subpass中的绘制,即绘制场景中所有物体:

1
2
3
4
5
6
7
8
9
10
cmd.bindDescriptorSets(vk::PipelineBindPoint::eGraphics, vkInfo->pipelineLayout["scene"], 2, 1, &scenePassDesc, 0, 0);
vk::DeviceSize offsets[] = { 0 };
tempBuffer = vertexBuffer->GetBuffer();
cmd.bindVertexBuffers(0, 1, &tempBuffer, offsets);
cmd.bindIndexBuffer(indexBuffer->GetBuffer(), 0, vk::IndexType::eUint32);

cmd.bindPipeline(vk::PipelineBindPoint::eGraphics, renderEngine.deferredShading.outputPipeline);
cmd.bindDescriptorSets(vk::PipelineBindPoint::eGraphics, vkInfo->pipelineLayout["scene"], 0, 1, &meshRenderer->gameObject->descSet, 0, 0);
cmd.bindDescriptorSets(vk::PipelineBindPoint::eGraphics, vkInfo->pipelineLayout["scene"], 1, 1, &meshRenderer->gameObject->material->descSet, 0, 0);
cmd.drawIndexed(meshRenderer->indices.size(), 1, meshRenderer->startIndexLocation, meshRenderer->baseVertexLocation, 1);

在结束第一个Subpass后,切换至第二个Subpass,这时我们的DrawCall只是简单的绘制一个屏幕空间矩形(而且顶点坐标都是写死在顶点着色器里的),剩下的工作都交给像素着色器完成就行了!

1
2
3
4
5
6
7
8
cmd.nextSubpass(vk::SubpassContents::eInline);
cmd.bindPipeline(vk::PipelineBindPoint::eGraphics, renderEngine.deferredShading.processingPipeline);
cmd.bindDescriptorSets(vk::PipelineBindPoint::eGraphics, renderEngine.deferredShading.pipelineLayout, 1, 1, &renderEngine.gbuffer.descSet, 0, 0);
cmd.bindDescriptorSets(vk::PipelineBindPoint::eGraphics, renderEngine.deferredShading.pipelineLayout, 2, 1, &scenePassDesc, 0, 0);
cmd.bindDescriptorSets(vk::PipelineBindPoint::eGraphics, renderEngine.deferredShading.pipelineLayout, 3, 1, &drawShadowDesc, 0, 0);
cmd.draw(4, 1, 0, 0);

cmd.endRenderPass();

附录

LightingUtil.hlsl源码:

1
2
3
4
5
6
7
8
9
10
11
12
13
14
15
16
17
18
19
20
21
22
23
24
25
26
27
28
29
30
31
32
33
34
35
36
37
38
39
40
41
42
43
44
45
46
47
48
49
50
51
52
53
54
55
56
57
58
59
60
61
62
63
64
65
66
67
68
69
70
71
72
73
74
75
76
77
78
79
80
81
82
83
84
85
86
87
88
89
90
91
92
93
94
95
96
97
98
99
100
101
102
103
104
105
106
107
108
109
110
111
112
113
114
115
116
117
118
119
120
121
122
123
//LightingUtil.hlsl
#include "Common.hlsl"

struct Material {
float4 diffuseAlbedo;
float3 fresnelR0;
float shininess;
};

/*计算衰减参数*/
float CalcAttenuation(float distance, float fallOffStart, float fallOffEnd) {
//线性衰减
return saturate((fallOffEnd - distance) / (fallOffEnd - fallOffStart));
}

/*Schlick近似法计算Fresnel方程*/
float3 SchlickFresnel(float3 R0, float3 normal, float3 lightVec) {
//计算法向量和光向量的夹角余弦值
float cosIncidentAngle = saturate(dot(normal, lightVec));
//Schlick近似方程
float f0 = 1.0f - cosIncidentAngle;
float3 reflectPercent = R0 + (1.0f - R0) * pow(f0, 5);
return reflectPercent;
}

/*冯氏光照模型*/
float3 BlinnPhong(float3 lightStrength, float3 lightVec, float3 normal, float3 toEye, Material mat) {
const float shininess = mat.shininess * 256.0f;
//为计算表面粗糙度 计算半角向量
float3 halfVec = normalize(toEye + lightVec);
//计算出表面粗糙度
float roughnessFactor = (shininess + 8.0f) * pow(max(dot(halfVec, normal), 0.0f), shininess) / 8.0f;
//Fresnel因子(半角向量作为法向量)
float3 fresnelFactor = SchlickFresnel(mat.fresnelR0, halfVec, lightVec);
//计算出镜面反射值
float3 specAlbedo = fresnelFactor * roughnessFactor;
//(漫反射 + 镜面反射) * 光强
return (mat.diffuseAlbedo.rgb + specAlbedo) * lightStrength;
}

/*方向光计算函数*/
float3 ComputeDirectionalLight(Light light, Material mat, float3 normal, float3 toEye) {
float3 lightVec = -light.direction;
//用Lambert余弦定理缩小光强
float lambertFactor = max(dot(lightVec, normal), 0.0f);
float3 lightStrength = light.strength * lambertFactor;

return BlinnPhong(lightStrength, lightVec, normal, toEye, mat);
}

/*点光源计算函数*/
float3 ComputePointLight(Light light, Material mat, float3 pos, float3 normal, float3 toEye) {
float3 lightVec = light.position - pos;

//物体和光源的距离
float distance = length(lightVec);
if (distance > light.fallOffEnd)
return 0.0f; //超出衰减范围,不接收光照
lightVec /= distance;

//用Lambert余弦定理缩小光强
float lambertFactor = max(dot(lightVec, normal), 0.0f);
float3 lightStrength = light.strength * lambertFactor;

//计算线性衰减
float att = CalcAttenuation(distance, light.fallOffStart, light.fallOffEnd);
lightStrength *= att;

return BlinnPhong(lightStrength, lightVec, normal, toEye, mat);
}

/*聚光灯计算函数*/
float3 ComputeSpotLight(Light light, Material mat, float3 pos, float3 normal, float3 toEye) {
float3 lightVec = light.position - pos;

//物体和光源的距离
float distance = length(lightVec);
if (distance > light.fallOffEnd)
return 0.0f; //超出衰减范围,不接收光照
lightVec /= distance;

//用Lambert余弦定理缩小光强
float lambertFactor = max(dot(lightVec, normal), 0.0f);
float3 lightStrength = light.strength * lambertFactor;

//计算线性衰减
float att = CalcAttenuation(distance, light.fallOffStart, light.fallOffEnd);
lightStrength *= att;

//计算聚光灯衰减
float spotFactor = pow(max(dot(-lightVec, light.direction), 0.0f), light.spotPower);
lightStrength *= spotFactor;

return BlinnPhong(lightStrength, lightVec, normal, toEye, mat);
}

//阴影贴图
[vk::binding(0, 3)]
SamplerComparisonState shadowSampler;

[vk::binding(1, 3)]
Texture2D shadowMap;

//计算PCF
float CalcShadowFactor(float4 shadowPos) {
shadowPos.xyz /= shadowPos.w;

float depth = shadowPos.z;
uint width, height, numMips;
shadowMap.GetDimensions(0, width, height, numMips);
float dx = 1.0f / (float)width;
float percentLit = 0.0f;

const float2 offsets[9] = {
float2(-dx, -dx), float2(0.0f, -dx), float2(dx, -dx),
float2(-dx, 0.0f), float2(0.0f, 0.0f), float2(dx, 0.0f),
float2(-dx, dx), float2(0, dx), float2(dx, dx)
};

for (int i = 0; i < 9; i++)
percentLit += shadowMap.SampleCmpLevelZero(shadowSampler, shadowPos.xy + offsets[i], depth).r;
return percentLit / 9.0f;
}